The Ultimate Guide for Using NAS for Plex
If you’re a movie enthusiast or a music fan, a NAS can be the ideal storage solution for your Plex Media Server. It centralizes your media, reduces clutter, and keeps everything running smoothly across all your devices. But before you dive in and buy a NAS, let’s explore why it’s a great match for Plex and what you need to consider to ensure it meets your needs.

Related reading:
NAS Storage Everything Explained.
Is a NAS Good for Plex?
Using a Network Attached Storage (NAS) device with Plex Media Server has several advantages:
- Centralized Storage. A NAS stores all your media files in one place, making it easier to organize and access your content across multiple devices.
- Energy Efficiency. Designed for continuous operation with low power consumption, NAS devices are more energy-efficient than running a full computer as a server.
- Data Protection with RAID. Many NAS devices support RAID configurations, combining multiple hard drives for improved performance and data redundancy. This protects your media library from hardware failures.
- User-Friendly Setup. With user-friendly interfaces and built-in support for apps like Plex, NAS devices simplify setup and management for users who aren’t tech-savvy. Click to read more: Choose 2 bay nas or 4 bay nas?
- Expandable Storage. Most NAS devices feature multiple drive bays, so you can expand your storage by adding more or larger hard drives as your media collection grows.
- Remote Access. You can access your media library remotely with a NAS, making it easy to stream content anywhere with an internet connection.
- On-the-Fly Transcoding. Some NAS devices include powerful processors capable of transcoding media on-the-fly, ensuring compatibility with various devices and streaming conditions.
Things to Consider When Choosing a NAS for Plex
A NAS is a valuable tool for Plex users, providing centralized storage, energy efficiency, data protection, and scalability. However, not all NAS devices are suitable for Plex. Here’s what you should keep in mind:
- Processor Power. A strong processor is crucial for transcoding, especially for 4K content. A capable CPU ensures smooth playback, particularly when multiple streams are running or when files need to be converted for different devices.
- Network Speed. High-speed connectivity is essential for streaming HD or 4K content without interruptions. A fast network interface ensures large files stream smoothly, even under high demand.
- Storage Capacity. Expansive media libraries, especially those with 4K files, require plenty of storage. Look for a NAS with the option to add more drives or upgrade to larger ones, ensuring your Plex server can grow with your collection.
- RAM. More RAM boosts performance, particularly when streaming multiple files or running other applications at the same time. Opt for a NAS with expandable memory for handling demanding tasks like transcoding or multi-user support.
- RAID Support. RAID configurations provide data protection and redundancy, guarding against drive failures. They also improve performance by distributing data across drives, which is helpful when streaming high-bitrate media.
Best NAS Storage for Plex of 2024/2025
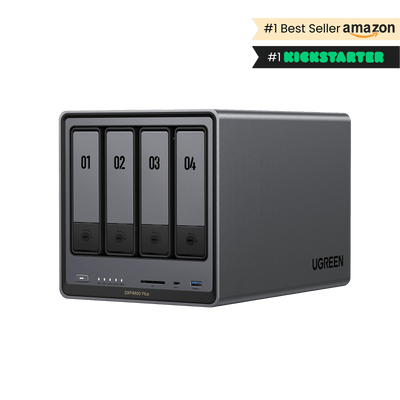
The UGREEN NASync DXP4800 Plus certainly can live up to its name as the best 4K NAS for Plex, and has a lot to offer:
- 12th Gen 5-core Intel® Processor. The Intel 8505 processor is capable of handling 4K media transcoding efficiently. While 4K transcoding can be demanding on a NAS, this processor offers enough power to stream 4K content, especially with hardware acceleration support, which reduces the strain on the CPU.
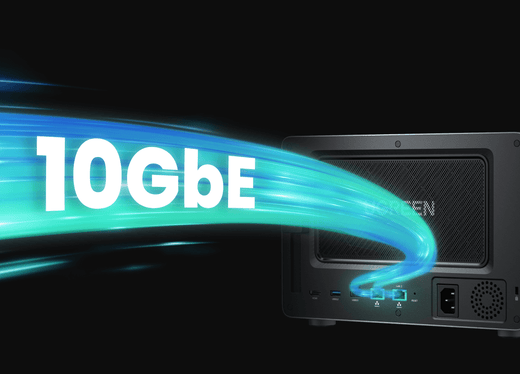
- 10GbE Network Port (Fast Data Transfer). 4K streaming demands high bandwidth, especially if you’re streaming directly to multiple devices or need fast access to large 4K media files. The 10GbE network interface ensures that data can be transferred at high speeds, avoiding buffering and lag during playback.
- 4 SATA Bays (Plenty of Storage for 4K Content). 4K media files can be large, often 20GB or more per movie. The 6-bay setup allows for ample storage for a large 4K media library, with room for expansion as your collection grows.
- Expandable RAM (Up to 32GB). More RAM can improve performance, particularly when running multiple applications or handling intensive tasks like transcoding multiple 4K streams simultaneously. The DXP4800 Plus ability to expand RAM to 32GB ensures smooth performance even when the NAS is under heavy load.
- RAID Support (Data Redundancy and Speed). With RAID configurations like RAID 5 or RAID 10, you can set up a redundant storage solution that helps protect your media library, which is crucial for anyone storing large amounts of irreplaceable 4K content.
{{UGPRODUCT}}
If you're searching for more NAS product options, check out our hand-picked NAS storage collection page for high-quality selections.
How to Install Plex on a NAS
Well, when you bring home a UGREEN NAS, you can follow the steps to complete the installation of Plex on the NAS.
1. Install Docker
- Go to the App Center on your UGREEN NAS.
- Search for and install Docker, a container application that allows you to run individual apps in an isolated environment rather than running full virtual machines.
- After installation, open the Docker app, which will now appear in your app list.
2. Choose the Plex Container Image
- In Docker, navigate to the Images tab.
- Search for Plex in the Image Database and download the version linuxserver/plex.
3. Create a Folder Structure for Media
- Use the File Manager to create shared folders (e.g., Movies, TV Shows, Music).
- Organize your media into subfolders, such as Config, Data, and Transcode.
4. Configure the Plex Docker Container
- Create a new container using the Plex image you downloaded.
- Allocate CPU and memory resources and set the container to restart automatically.
5. Set Storage Volumes
- Map the container directories to your shared folders and assign read/write permissions.
6. Configure Network Settings
- Use host mode for network settings or assign a dedicated connection to avoid congestion.
7. Set Environment Variables
- Configure variables like User ID (UID), Group ID (GID), Timezone, Plex Version, and Claim Token.
8. Fetch UID and GID
- Temporarily enable SSH on your NAS and retrieve these values using an SSH client like PuTTY.
9. Final Steps
- Enter the Plex Claim Token from plex.tv to link your server to your account.
- Complete the setup wizard via a browser by visiting app.plex.tv or your NAS’s IP address.
The Bottom Line
Using a NAS for Plex is a smart choice for an efficient, energy-saving way to manage and stream your media. The right NAS offers the perfect combination of performance and convenience, whether you need 4K streaming, data protection, or expandable storage. Just make sure your NAS has the processing power, speed, and capacity to handle your needs.
Ready to upgrade your Plex experience? The UGREEN NASync DXP4800 Plus is the perfect solution.


