How to Optimize NAS Storage for Adobe Premiere Pro Editing
A 10GbE NAS can move large video files quickly, but Premiere Pro editing depends on more than headline transfer speed. Timeline playback, scrubbing, project loading, waveforms, thumbnails, previews, and auto-saves all create small-file and latency-heavy workloads. That is why 4K footage can still stutter from a NAS even when file transfers look fast.
Whether you are on the DXP4800 Plus with an optional 10GbE card or the DXP480T Plus with a direct Thunderbolt connection, the principles and steps below apply to your setup.

Quick Answer: Best NAS Workflow for Premiere Pro
For Adobe Premiere Pro, use UGREEN NAS storage for source footage and shared project media, but keep Media Cache, previews, scratch disks, and temporary files on a local SSD. Use SMB3 for most mixed-platform workflows, 10GbE for high-bitrate 4K editing, and proxies when the codec or bitrate is too heavy for smooth playback.
Quick Diagnosis: Why Premiere Pro Feels Slow on NAS
| Symptom | Likely Cause | Best Fix |
|---|---|---|
| Timeline playback stutters | Cache or previews stored on NAS | Move Media Cache and scratch disks to local SSD |
| Scrubbing feels delayed | Network latency or small-file access | Use local cache, proxies, and SMB3 |
| Large file copies are fast but editing is slow | Sequential speed is fine, random I/O is weak | Keep media on NAS but cache locally |
| 4K or 8K playback drops frames | Codec, bitrate, CPU/GPU, or network bottleneck | Use proxies and test NAS throughput |
| Team projects conflict | Multiple users accessing the same project or cache | Use Productions and separate local cache folders |
| NAS speed drops during editing | CPU, RAM, disk, or network saturation | Monitor NAS performance during playback |
| Auto-save creates delays | Auto-save folder is shared or network-heavy | Use sensible auto-save intervals and user-specific folders |
Why NAS Has Trouble with Premiere Pro
NAS server is fast enough to transfer large files. So why does Premiere Pro still skip during playback? The reasons come down to four main problems:
1. Slow Access to Small Files
Premiere Pro needs rapid access to small files, like the Media Cache (.pek and .cfa files) generated during editing. These files are read and written frequently, especially when playing back or scrubbing the timeline. While NAS handles big video files efficiently in order, it struggles with quickly retrieving small files. NAS prefers sequential access.
This challenge becomes more difficult with 4K or 8K footage, which generates many large files. Although NAS can handle the big files, it gets stuck when Premiere Pro repeatedly requests small cache files, causing laggy playback and frustration.

2. Delays in the Network
Connecting to NAS over SMB or NFS introduces latency. While this is acceptable for general file sharing, even slight delays can disrupt your editing flow.
Smooth timeline navigation requires fast response. Any delay when Premiere Pro asks for a file, thumbnail, waveform, or preview can make editing feel slower than the NAS speed test suggests.
SMB3 is usually the safest default for Windows and mixed-platform editing workflows. On macOS or Linux-based setups, SMB and NFS should be tested with the same project media because real performance depends on the NAS, client OS, network adapter, switch, storage pool, and file pattern.
Even with 10GbE, network storage is still different from plugging a fast SSD directly into your computer.
3. Codec, Bitrate, and Multicam Workflows Still Matter
NAS speed is only one part of the editing chain. Premiere Pro performance also depends on the media format.
Network bandwidth sets a hard ceiling, but codec complexity can become the bottleneck well before that ceiling is reached:
| Codec | Resolution | Frame Rate | Approximate Bitrate | Required Sustained Read |
|---|---|---|---|---|
| H.264 | 4K | 30fps | 30~100 Mbps | 4~13 MB/s |
| H.265 (HEVC) | 4K | 30fps | 20–80 Mbps | 3–10 MB/s |
| ProRes 422 | 4K | 30fps | ~550–650 Mbps | ~70–80/s |
| ProRes 422 HQ | 4K | 30fps | ~800–900 Mbps | ~100–115 MB/s |
| ProRes 4444 | 4K | 30fps | ~1000–1300 Mbps | ~125–160 MB/s |
| REDCODE RAW | 8K | 24fps | ~800–2000+ Mbps | ~100–250+ MB/s |
A UGREEN NASync DXP4800 Plus running four drives in RAID 5 comfortably sustains the reads required for ProRes 422 HQ over a single 10GbE link.
H.264 and H.265 demand so little bandwidth that stutter on those codecs almost always points to CPU or GPU decoding load, not NAS throughput. If the same footage stutters when copied to a local SSD, the NAS is not the bottleneck.
Other factors that affect playback:
- Resolution and frame rate
- Bit depth
- Chroma subsampling
- Multicam count
- GPU and hardware decoding support
4. Collaboration Challenges
When working with a team, NAS can slow things down further if the workflow is not planned carefully.
Multiple users accessing the same project files or media can overload the system. Only one person should edit a normal standalone Premiere Pro project file at a time. Auto-saves from multiple users can also fill the NAS, and sharing a Media Cache folder may lead to file conflicts or corruption.
These issues like small file access, network latency, and team collaboration explain why NAS can feel clunky with Premiere Pro.
Should You Edit Premiere Pro Projects Directly from a NAS?
Yes, but not every part of the workflow belongs on the NAS.
A NAS is useful for:
- Source footage
- Shared media libraries
- Project archives
- Team-accessible folders
- Finished exports
- Backup copies
- Centralized production storage
A NAS is not ideal for:
- Media Cache
- Preview files
- Scratch disks
- Temporary render files
- Shared cache folders
- Heavy active files that Premiere Pro reads and writes constantly
For solo editors, you can keep the project file on the NAS if the connection is stable and performance is acceptable. If you notice project loading delays or auto-save lag, keep the active project file on your local SSD and sync or archive it to the NAS later.
For teams, use Productions or a properly structured collaboration workflow instead of letting multiple editors open and modify the same standalone .prproj file.
Which UGREEN NASync Model Is Right for Premiere Pro Editing?
Not every UGREEN NAS is sized the same way for video work. The right model depends on your codec, resolution, team size, and how you plan to connect.
Solo Editor — Up to ProRes 422 HQ at 4K
UGREEN NASync DXP4800 Plus
The DXP4800 Plus runs an Intel 8505 processor with 1x 2.5GbE, 1x 10GbE ports. In RAID 5 with four drives, it delivers sustained reads well above what ProRes 422 HQ requires over a single 2.5GbE link. The PCIe Gen 3 x4 slot accepts an optional 10GbE card, which opens it up to ProRes 4444 and high-frame-rate 4K editing without a proxy workflow. This is the practical starting point for a solo Premiere Pro editor.
{{UGPRODUCT}}
Small Team — High-Bitrate 4K and Multicam
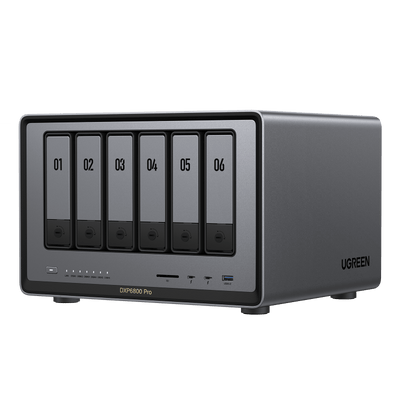
UGREEN NASync DXP6800 Pro
The DXP6800 Pro steps up to an Intel Core i5-1235U, six bays, and dual 10GbE. The stronger CPU handles concurrent NAS-side tasks faster: SMB encryption overhead, thumbnail generation, and background transcoding. multi-editor workflows where two or three Premiere Pro seats are pulling high-bitrate media simultaneously.
{{UGPRODUCT}}
Editors Who Want Near-Local SSD Speed
UGREEN NASync DXP480T Plus
The DXP480T Plus includes Thunderbolt connectivity. Connect it directly to your editing workstation and the latency and random I/O limitations that affect SMB-based editing disappear almost entirely. For a solo editor who wants NAS capacity with direct-attached performance, this is the cleanest solution and removes most of the network configuration work described in this guide.
How to Improve NAS Performance in Premiere Pro
If your NAS feels slow, you can optimize it for faster editing, whether solo or team-based. Follow these steps:
1. Keep Small Files Off the NAS
Premiere Pro’s cache files can bog down NAS performance.
Store Media Cache locally
Save cache files to your computer’s internal SSD.
How:
- Windows: Edit > Preferences > Media Cache
- macOS: Premiere Pro > Settings/Preferences > Media Cache
Set the Media Cache location to a folder on your local SSD.
This is one of the most important changes you can make. Media Cache files are small, frequently accessed, and better suited to fast local storage than network storage.
2. Use SMB3 for Stable Premiere Pro NAS Editing
Older protocols can introduce delays or compatibility issues. For most Windows and mixed-platform environments, SMB3 is the best starting point.
Enable SMB3 on UGREEN NAS
On UGREEN NAS:
- Go to Control Panel > File Service > SMB.
- Enable SMB service.
- Open Advanced settings.
- Set supported SMB protocol to SMB2, SMB2.1, SMB3.

Enable Jumbo Frames for 10GbE Connections
Jumbo frames increase the network packet size from the standard 1500 bytes to 9000 bytes (MTU 9000). For large sequential reads like streaming video files from your NAS to Premiere Pro, this reduces CPU overhead per packet and improves sustained throughput at 10GbE speeds.
How to enable jumbo frames on UGREEN NAS:
- Go to Control Panel > Network > Network connection.
- Select your LAN interface (e.g., LAN 1) and click Edit.
3.Scroll down in the interface settings dialog; the MTU field is at the bottom. - Set MTU to 9000.

On your Windows workstation NIC:
- Open Device Manager > Network Adapters.
- Right-click your 10GbE NIC > Properties > Advanced.
- Find Jumbo Packet or Jumbo Frame and set to 9014 Bytes or 9000 Bytes, depending on the driver.
On your switch:
Enable jumbo frames in the switch management interface. Unmanaged switches do not support jumbo frame configuration — a managed switch is required for 10GbE editing setups.
After enabling jumbo frames across all devices, run a large file copy. The gain is more meaningful at 10GbE than at 2.5GbE.
Check your network
Use the right connection for your footage and team size:
- Use 10GbE connections for high-bitrate 4K, 8K, multicam, or team editing.
- Make sure the entire path supports the target speed: NAS port, switch, cable, and client adapter.
- Do not expect full 10GbE performance if one part of the chain is still 1GbE.
Map drives consistently
Consistent paths prevent missing media and relinking problems.
Windows:
Assign the same drive letter on each workstation, such as Z:.
Mac:
Use consistent server names, such as:
smb://editing-nas
For teams, every editor should use the same folder structure and connection path whenever possible.
3. Configure RAID for Sustained Read Performance
RAID configuration directly affects how your NAS handles the sustained sequential reads that video editing demands. Different RAID levels make different trade-offs between capacity, speed, and fault tolerance.
| RAID Level | Drive Fault Tolerance | Read Performance | Storage Efficiency | Good For |
|---|---|---|---|---|
| RAID 0 | None | Fastest | 100% | Scratch or proxy drives only — no redundancy |
| RAID 1 | 1 drive | Moderate | 50% | Small 2-bay setups, critical project storage |
| RAID 5 | 1 drive | Good | ~67–80% | Solo editors and small teams |
| RAID 6 | 2 drives | Good | ~50–75% | Larger teams, long productions |
| RAID 10 | 1 per mirror pair | Best | 50% | High-performance multi-editor workflows |
For most Premiere Pro workflows on a UGREEN NASync, RAID 5 with four or more drives gives a practical balance of read speed, fault tolerance, and usable capacity. If you are running three or more editors pulling footage simultaneously, RAID 10 delivers better sustained performance and is worth the storage trade-off.
SSD cache is worth adding on any UGREEN NASync model that supports it. If you’re deciding how to split SSD and HDD roles, this guide to SSD caching in a hybrid NAS setup explains when SSDs should serve as cache versus a separate high-speed pool. Premiere Pro generates repeated small read requests for metadata, thumbnails, and waveform data. An SSD read cache absorbs those requests without touching the spinning drive pool, which reduces latency noticeably even when sequential throughput is already adequate.
4. Use Proxies for Heavy Footage
If playback still stutters, create lightweight proxy files.
Proxies are smaller temporary editing files that make timeline playback smoother. Premiere Pro links them to the original media, so you can edit with proxies and export from the full-resolution source files later.
How:
- Right-click footage in the Project Panel.
- Choose Proxy > Create Proxies.
- Select a lightweight preset.
- Store proxy files on local SSD or a fast NAS folder, depending on workflow.
If proxies immediately fix playback, the bottleneck was not only the NAS. The original codec, bitrate, or workstation decoding load was part of the problem.
5. Prevent Team Collisions
Reduce workflow interruptions by planning how project files, cache files, and auto-saves are stored.
Use Productions
In Premiere Pro:
- Go to File > New > Production.
- Save the Production folder to your NAS.
- Organize projects inside the Production so team members can work in a controlled structure.
Productions are better suited to shared long-form work than one large standalone project file.
Do not share one Media Cache folder
Each editor should keep Media Cache on their own local SSD.
Sharing one cache folder can create:
- File conflicts
- Slow timeline response
- Unnecessary NAS load
- Cache corruption risk
Space out auto-saves
Change auto-save frequency to avoid constant network writes.
How:
- Go to Edit > Preferences > Auto Save.
- Set a practical interval, such as every 10 minutes.
- Use user-specific auto-save folders when multiple editors are working on the same production.
Keep shared media organized
Use clear folder structure on the NAS:
/Projects
/Projects/Project_Name
/Projects/Project_Name/Media
/Projects/Project_Name/Audio
/Projects/Project_Name/Graphics
/Projects/Project_Name/Exports
/Projects/Project_Name/Auto-Saves
/Projects/Project_Name/Archives
Best Practices for Ongoing Performance
Premiere Pro creates temporary Media Cache files during editing. Over time, these accumulate and can slow things down, especially with old projects.
How to Clean Cache
- Open Premiere Pro.
- Go to Edit > Preferences > Media Cache.
- Click “Delete” next to “Media Cache Files” to remove unused cache.
Repeat periodically, especially after completing big projects.
Monitor Your NAS
Your NAS handles large files and multiple users. If it’s underperforming, your workflow suffers.
How to Keep It in Check:
- Regularly review:
- CPU usage (how hard it’s working).
- RAM usage (how much memory it’s using).
- Disk health (how the drives are doing).
- Network speed (how fast data’s moving).
- Use NAS tools to monitor performance.
If the CPU is constantly maxed out or disks show errors, consider upgrading or optimizing your setup.
Keep Clocks in Sync
Mismatched system clocks can cause file and backup errors.
How to Sync:
- Enable NTP (Network Time Protocol) on your NAS and computers for automatic synchronization.
- On NAS: Settings > Time > Enable NTP.
- On PC: Settings > Date & Time > Set time automatically.
Set it up once, and it’ll stay in line on its own.
Stay Updated
Regular updates improve compatibility and performance:
How to Update:
- Check for NAS firmware updates regularly.
- Keep Premiere Pro updated to ensure optimal integration.
- Test your setup after updates.
Consistent maintenance and following these practices will keep your NAS and Premiere Pro running smoothly, saving you headaches and boosting your editing efficiency.
FAQs About Using Premiere Pro on NAS
Which UGREEN NAS is best for Premiere Pro 4K editing?
It depends on your codec and team size. The DXP4800 Plus handles solo editing up to ProRes 422 HQ over 10GbE. The DXP6800 Pro is the better fit for small teams pulling high-bitrate footage from multiple workstations simultaneously. If you want near-local-SSD performance without network configuration overhead, the DXP480T Plus with Thunderbolt is the most straightforward setup for a solo editor.
Can I edit Premiere Pro projects directly from a UGREEN NAS?
Yes, but the best workflow is to keep source media on the NAS and store Media Cache, previews, scratch files, and temporary files on a local SSD. For teams, use Productions instead of having multiple users work from the same standalone project file.
Should Premiere Pro Media Cache be stored on the NAS?
No. Store Media Cache on your computer’s local SSD. Media Cache files are small and frequently accessed, which makes them a poor fit for network storage. Putting them on the NAS is one of the most common causes of sluggish timeline response, and fixing it costs nothing.
Why is Premiere Pro slow even though NAS file transfers are fast?
Large file copy speed tests sequential transfer only. Premiere Pro also needs fast access to small files — cache files, previews, metadata, and project data — which is far more sensitive to latency and random I/O than a speed test shows. The most reliable fixes are moving Media Cache to a local SSD, enabling SMB3, and using proxies for codecs with high decode overhead.
Do jumbo frames and SMB Multichannel actually improve Premiere Pro performance?
Jumbo frames reduce CPU overhead on large sequential reads and improve sustained throughput over 10GbE, but only when enabled on every device in the network path: NAS, switch, and client NIC. SMB Multichannel adds bandwidth by bonding multiple network links between the NAS and workstation. For most editors, moving Media Cache to a local SSD produces a more immediate improvement than either of these optimizations, but jumbo frames and Multichannel are worth enabling once the workflow basics are correct.
Does SSD cache help Premiere Pro editing on a UGREEN NAS?
An SSD read cache helps with the repeated small-file requests that Premiere Pro generates for thumbnails, waveforms, and metadata. It will not fix poor network configuration, heavy codec decoding, or Media Cache stored on the NAS. A local SSD for cache and scratch is still the most impactful single change, but SSD cache on the NAS is a useful complement once everything else is configured correctly.
Should I use SMB or NFS for Premiere Pro on a UGREEN NAS?
SMB3 is the correct starting point for Windows and mixed-platform workflows. NFS can be relevant in macOS or Linux environments, but should be tested against SMB3 with the same project media before committing. On macOS, performance differences between SMB and NFS vary enough by hardware configuration that testing on your specific setup is worth the time.
What is the difference between Premiere Pro Productions and Team Projects?
Productions is a local or NAS-based feature that lets multiple editors work on different sequences within the same project structure simultaneously, with file locking to prevent conflicts. It works entirely through your NAS or local storage. Team Projects is a separate, cloud-based Adobe feature requiring a Creative Cloud team plan — it does not use your NAS for storage at all. For NAS-based team editing, Productions is the right tool.
Conclusion
A UGREEN NASync can serve as the backbone of a Premiere Pro editing workflow, but configuration determines whether it actually works. Keep source media and shared assets on the NAS, move Media Cache and scratch files to a local SSD, enable SMB3 with Multichannel and jumbo frames on 10GbE setups, and match your RAID level to your team size and performance requirements.
If Premiere Pro is still slow after following this guide, do not focus only on NAS throughput. Check codec complexity, cache location, and whether the network path is fully 10GbE end to end before adding hardware.