5 Proven Fixes for Slow NAS Cloud Sync
Ever felt like your blazing-fast internet is stuck in slow-motion when syncing your NAS to the cloud?
This guide cuts through the slowdowns, pinpoint why your NAS and cloud aren’t playing nice and fix it. A smooth sync keeps your backups safe and your remote work humming.

Key Takeaways:
- Slow NAS-to-cloud sync is often caused by local network issues, outdated NAS hardware, or mismatched cloud services—not your internet speed alone.
- Boosting sync performance involves simple fixes like switching to Ethernet, updating firmware, enabling caching, and increasing upload threads.
- Scheduling syncs during off-peak hours and fine-tuning software settings can significantly improve file transfer speeds and system reliability.
- Choosing the right cloud service—based on speed, compatibility, cost, and security—is essential for smooth, dependable NAS backups.
Understanding Slow NAS Cloud Sync Speeds
You've invested in a blazing-fast 1 Gbps internet connection, yet your NAS-to-cloud sync trickles along at just 2-3 MB/s. The issue isn't your network speed, but something deeper in your setup.
Diagnose Network Bottlenecks
- User Pain Points: You might be quick to call your ISP, frustrated that your sync speeds don’t match your plan. But often, the issue lurks closer—Wi-Fi interference, router missteps, or even sneaky ISP throttling.
Solution:
- Approach A: Start with your connection. Wi-Fi can bog things down. Switch to Ethernet for a smoother ride.
- Approach B: Peek at your router’s Quality of Service (QoS) settings. It’s like a traffic cop that might be slowing your NAS data. Adjust it to give sync traffic the green light.
Investigate NAS Limitations
- User Pain Points: Is your NAS the bottleneck? Older models or overloaded systems can struggle, leaving you wondering why uploads take forever.
Solution:
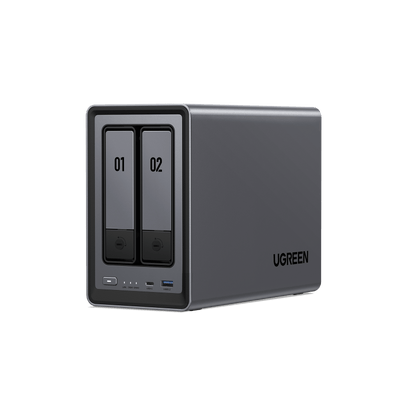
- Approach A: Check your NAS’s CPU and RAM during a sync. If they’re pegged at 100%, your device is overwhelmed—time to upgrade or lighten its workload. You can explore high-performance models in the UGREEN NAS storage collection—they’re designed to handle heavy workloads with better CPUs, more RAM, and scalable drive bays.
- Approach B: Look at your sync software. Tools like Synology’s Cloud Sync often limit upload threads—crank them up for a speed jolt.

Common Mistake
Don’t jump to blaming your internet speed without inspecting your NAS and network first.
Prep→Execute→Verify Sub-Flow
- Prep: Run an internet speed test and jot down your NAS model and cloud service.
- Execute: Tackle the network and NAS fixes above, tweaking one piece at a time.
- Verify: Test your sync speed after each change. Did it climb? If not, keep adjusting.
Why This Matters
Slow syncs aren’t just a nuisance—they’re a risk. Half-finished backups leave your data exposed, like a house with an unlocked door. By pinpointing and fixing these slowdowns, you’re not only boosting speed, you’re safeguarding your files. Ready to get started?
{{UGPRODUCT}}
Optimizing NAS Settings for Faster Sync
Imagine your NAS (Network Attached Storage) as a shared family photo album. Everyone in the family can add their pictures, and everyone can see them. But if the album is a mess, finding the photo you want takes forever. That’s where optimizing your NAS settings comes in—it makes syncing faster and more efficient. Syncing is how your NAS backs up or shares files with other devices, like your computer or the cloud. Slow syncing can feel like waiting for paint to dry, but with a few tweaks, you can speed things up and keep your files flowing smoothly.
Why bother? A well-tuned NAS syncs quickly, runs better, and saves you time. Faster syncs mean your files are backed up or shared without delay, giving you one less thing to worry about. Let’s walk through some simple steps to optimize your NAS and boost those sync speeds.
Click to read more: Troubleshooting 6 Common NAS Performance Issues.
Step 1: Update Your NAS Firmware
Firmware is the software that runs your NAS, like the operating system on your phone. Updating it can fix bugs and improve performance. Outdated firmware might slow down your sync speeds, so keeping it current is a smart move.
-
How to do it:
- Log into your NAS dashboard (usually via a web browser).
- Go to “Settings” or “Control Panel.”
- Look for “Firmware Update” or “System Update.”
- If there’s a new version, hit “Update Now” and let it run.
Step 2: Enable Caching for Faster Data Transfer
Caching speeds up how your NAS handles files. Think of it as a fast notepad where you scribble notes before adding them to a big, slow book. By turning on caching, your NAS stores data in a quick-access spot, making syncing zip along.
-
How to do it:
- Head to your NAS settings.
- Check under “Storage” or “Performance.”
- Look for “Caching” or “SSD Caching” (if your NAS supports it).
- Switch it on and pick the settings that fit your setup.
Step 3: Adjust the Sync Schedule
If your NAS syncs when everyone’s online, like during movie night, it can get bogged down. It’s like driving in rush-hour traffic. Setting syncs for quieter times, like overnight, helps it run smoothly without competition.
-
How to do it:
- Open your sync software (like your cloud app).
- Find “Sync Settings” or “Schedule.”
- Set it to sync during off-peak hours, like late at night.
It’s all about timing—pick the quiet moments, and your NAS will thank you.
Step 4: Increase Upload Threads
Upload threads are like checkout lines at a store. More lines mean more customers, or files, can get through at once. Increasing threads lets your NAS sync multiple files together, speeding up the process.
-
How to do it:
- In your sync software, go to “Advanced Settings” or “Performance.”
- Look for “Concurrent Uploads” or “Upload Threads.”
- Bump it up by 2-3 from the default setting.
Don’t overdo it, though—too many threads can overwhelm your NAS, like opening too many lines without enough staff. Test and tweak as needed.
Step 5: Check Your Network Connection
A shaky connection slows everything down. If your NAS is on Wi-Fi, it might be jostling for bandwidth, like sharing Wi-Fi at a busy café. Switching to an Ethernet cable gives it a direct, fast link to the internet.
-
How to do it:
- Connect an Ethernet cable from your NAS to your router.
- If Wi-Fi’s your only choice, move the NAS closer to the router or switch to a less crowded channel.
Ethernet is like a VIP lane for your data—no crowds, no delays.
Choosing the Right Cloud Service for NAS Syncing
Picking the right cloud service for your NAS sync is like choosing the best streaming service for your favorite shows. Some are fast, some are affordable, and some just fit your style. The right choice makes syncing your files smooth and stress-free. But with so many options, it’s easy to feel overwhelmed. Don’t worry! This guide will help you find the perfect cloud service for your NAS, ensuring your files sync quickly and reliably.
Why does this matter? A good cloud service can save you time, money, and headaches. It’s like having a reliable car that gets you where you need to go without breaking down. Let’s explore what to look for and how to make the best choice.
Step 1: Check Compatibility with Your NAS
Not all cloud services play nice with every NAS. It’s like trying to fit a square peg in a round hole—if they don’t match, it won’t work. Check your NAS manual or website to see which cloud services it supports.
-
How to do it:
- Visit your NAS manufacturer’s website.
- Look for a list of supported cloud services under “Cloud Sync” or “Backup.”
- Make sure your top choices are on that list.
This step is crucial—skip it, and you might waste time on a service that won’t work with your setup.
Step 2: Compare Sync Speeds
Sync speed is how fast your files move between your NAS and the cloud. Some services are zippy, others are sluggish. It’s like comparing a sports car to a minivan—both get you there, but one does it faster.
-
How to do it:
- Search for user reviews or forums where people share their experiences.
- Look for comments on upload and download speeds.
- If possible, test a small file with a trial account to see for yourself.
Faster syncs mean less waiting and more doing. Choose a service that keeps up with your pace.
Step 3: Consider Storage Costs
Cloud services charge for storage, and prices vary. It’s like shopping for groceries—some stores are pricier, but you might get better quality or service. Find a balance between cost and features that works for you.
-
How to do it:
- Check the pricing page of each cloud service.
- Calculate how much storage you need and what it will cost monthly or yearly.
- Look for any hidden fees, like extra charges for data transfers.
Don’t let costs sneak up on you—plan ahead to avoid surprises.
Step 4: Evaluate Security Features
Your files are important, so security matters. A good cloud service should protect your data like a bank vault. Look for features like encryption, two-factor authentication, and regular backups.
-
How to do it:
- Visit the security section of each service’s website.
- Check if they offer end-to-end encryption (it’s like locking your files in a safe).
- See if they have options for extra protection, like password-protected sharing.
Peace of mind is priceless—choose a service that takes security seriously.
Step 5: Test Customer Support
Sometimes things go wrong, and you need help fast. Good customer support is like having a trusty mechanic on speed dial. Test how responsive and helpful the service is before you commit.
-
How to do it:
- Send a quick question to their support team via email or chat.
- See how long it takes to get a reply and if the answer is clear.
- Check online reviews for other users’ experiences with support.
You don’t want to be left hanging when you need assistance—pick a service that’s got your back.
Final Thought
Technology can be tricky, but you’re not alone. There are forums, support teams, and guides like this one to help you along the way. It’s like having a community of neighbors ready to lend a hand. If you get stuck, don’t hesitate to ask for help. And when you succeed, share your tips with others—you might just make someone’s day a little easier.


