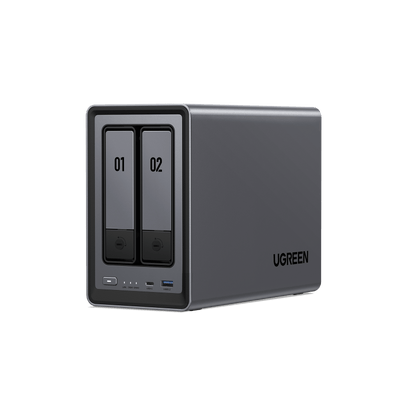
How to Host VMs on UGREEN NAS
Storage is step one. If a NAS fits your VM environment—thanks to simpler backups, easier host swaps, and the ability to move workloads between machines—the next question is: how do you run VMs on a NAS.
This guide walks you through UGREEN NAS virtualization: bridged networking, VM creation from ISOs or disk images, and tuning the two biggest performance drivers—storage I/O and network configuration—so you can scale confidently from one VM to many.
Video Walkthrough
Prefer video? Here’s a quick walkthrough before you start. It covers bridged networking, VM creation (ISO/image import), and the key settings that impact real-world performance.
You can follow the video first, then use the steps below as a checklist.
Setting Up VMs on UGREEN NAS
UGREEN NAS offers an unexpected opportunity: a platform for virtual machines (VMs) that blends storage with computing power. Setting up VMs on a device traditionally reserved for file backups might seem daunting, knowledge gaps, resource missteps, and setup hiccups abound. Yet, with the right approach, this process becomes a gateway to efficiency.
Preparing Your UGREEN NAS for Virtualization
To ensure the best user experience, please configure the network settings before creating a virtual machine.
- On the [Network Connection] page, click [Network Bridging] > [Virtual Bridging].

- Check [Enable Virtual Network Bridging], select the currently used LAN port, and click “Apply.”
- Click “Continue” to create the virtual bridge network adapter.
- On the virtual machine homepage, go to [Manage] > [Network], and set the mode of the virtual subnets [vnet-bridge0] and [vnet-bridge1] to [Bridged Mode - LinuxBridge].

Create a Virtual Machine
There are two ways to create a virtual machine in UGREEN NAS: import a virtual machine image or use a local ISO image.
Import a Virtual Machine
The “Virtual Machine” application offers several methods for importing virtual machines. To begin the import process, users can click the [New] button on the virtual machine management page, select [Import Virtual Machine], and follow the steps in the import wizard.
Import from Disk Image:
- If the user selects [Import from OVA File], they must first locate the required OVA image file in “Files” and click [OK] to add it to the import list.
- Once the file is added, click [Next] to continue.
- Choose the storage location where the virtual machine data will be saved. The user may select a location based on their specific needs.
- After selecting the storage location, click [Next] to proceed.
- In the following steps, the user can configure basic settings such as the virtual machine’s name, operating system type, and network configuration, as well as advanced options.
- For instance, the user can assign a recognizable name to the virtual machine and select the appropriate system type.
- Once all configurations are complete, click [Next] to move to the final step.
- After reviewing and confirming the settings, click [Finish] to begin creating the virtual machine instance.
UGREEN Tip: The disk image import feature supports the following file formats: .img, .qcow2, .vdi, and .vmdk.
Import from OVA File:
- If the user selects [Import from OVA File], they must first locate the required OVA image file in “Files” and click [OK] to add it to the import list.
- Once the file has been added, click [Next] to proceed.
- Select the storage location where the virtual machine data will be saved. The user can choose a location based on their specific requirements.
- After selecting the storage location, click [Next] to continue.
- In the following steps, the user can configure basic settings, including the virtual machine’s name, system type, and network configuration, as well as advanced options.
- For example, the user can assign a recognizable name to the virtual machine and select the appropriate system type.
- After completing the configuration, click [Next] to proceed to the final step.
- Once all settings have been reviewed and confirmed, click [Finish]. The system will then begin creating the virtual machine instance.
Create Using an ISO Image:
- On the virtual machine homepage, click “New” > “New Virtual Machine” to open the creation wizard.
- Select an ISO format image (if no images have been uploaded, click “Manually Upload” to add an image to the local image library). Click “Next.”
- Choose the storage location for the virtual machine data, and click “Next.”
- Configure the system type and leave other settings as default. Click “Finish” to create the virtual machine instance.
Troubleshooting the Inevitable
Setup rarely goes flawlessly. Here’s how to tackle common snags:
- VM Won’t Boot: Check resource allocations (too stingy?) and network settings (misconfigured?).
- OS Install Fails: Confirm your ISO isn’t corrupted and the VM boots from the right source.
- Sluggish Performance: More RAM or SSDs might be your fix. Monitor usage to pinpoint the bottleneck.
Optimizing and Managing VMs on UGREEN NAS
Most users assume throwing more CPU or RAM at a VM will solve lag issues. Surprisingly, the way you configure storage and networking often matters more. Here’s how to get real-world gains:
- Pick the Right Storage Protocol: VMs need fast storage access. iSCSI delivers low latency for speed-hungry tasks, while NFS keeps things straightforward. Choose iSCSI for performance, NFS for simplicity.
- Boost with SSD Caching: Hard drives handle bulk storage, but VMs thrive on quick I/O. Add an SSD cache to turbocharge performance without breaking the bank, it’s like giving your NAS a shot of espresso.
- Balance CPU and RAM: Allocate resources carefully. Start with 2 CPU cores and 4GB RAM per VM, then tweak based on usage. Overdoing it for one VM can bottleneck the rest.
Managing VM Images (Import/Export)
A virtual machine is only as portable as its image management. Whether you’re backing up or moving to another host, understanding imports and exports is essential:
- Importing Images: In the UGOS PRO System, upload your OVA, VMDK, img, file qcow2 orvdi. If UEFI settings vanish, boot into rescue mode and reinstall GRUB. It’s a quick fix, like resetting a tripped breaker.
- Exporting Images: Power off the VM first to avoid glitches. Export as OVA file . Always back up before you tweak.
Troubleshooting Common VM Issues on UGREEN NAS
- VM Won’t Boot: A VM that refuses to start often signals a resource or settings mismatch. Check if you’ve allocated enough CPU and RAM in UGOS PRO. Then, confirm the boot order, make sure it’s pointing to the right drive. Adjust as needed, and it’ll hum to life.
- OS Install Fails: If the operating system won’t install, suspect the ISO file or boot configuration. Test the ISO for corruption and ensure the VM is set to boot from it. Think of it as confirming there’s fuel in the tank before you turn the key.
- Wrong VM Type: Choosing the wrong VM type, like UEFI for a legacy OS or BIOS for a modern one, can derail compatibility. Match the type to your OS requirements: UEFI for newer systems, BIOS for older ones. It’s a simple fix that’s easy to miss.
Conclusion
Fire up a VM on your UGREEN NAS and feel the difference for yourself.